
Installing Ubuntu on a Lenovo X1 Yoga 3
Contents
- Installing Ubuntu on a Lenovo X1 Yoga 3
Introduction
This page describes some of the steps I took to install and configure Ubuntu Linux 18.04 on a Lenovo X1 Yoga (3rd Generation) laptop.
Purpose of this page. I post this information so that I may easily refer to it in the future, if/when I forget how to do this stuff next time I configure a machine.
Disclaimer. If you make use of the information on this page, then you do so at your own risk. I am not responsible for any damages or injuries sustained as a result of following the instructions below.
On the other hand, if you follow these instructions and something doesn't work for you, I'd like to hear about it. In that case, please send me an email!
Installing Ubuntu alongside Windows 10
-
Download Ubuntu 18.04 and make a startup iso image on a blank usb drive. (Use a utility like the Ubuntu Startup Disk Creator app.)
-
Boot the laptop and hit
Enterwhen the Lenovo splash screen appears to enter the BIOS setup utility. (Be very careful to not change too many BIOS settings. You can brick the machine if you mess around too much with the BIOS.) -
As suggested here, modify the EFI BIOS settings and disable "Secure Boot" feature. This setting is found in the "Security > Secure Boot" menu of the BIOS configuration program.
-
In the "Startup" BIOS menu item,
- set the "UEFI/Legacy Boot" option to "Both"
- set the "Boot Mode" option to "Diagnostics"
-
Boot into Windows, and follow the repartitioning instructions given at this site
Here is a summary of those instructions.
Assuming your machine comes with a single partition on which Windows 10 has been installed, you will need to shrink the Windows partition to make room for Ubuntu. (N.B. This can be done without damaging the Windows 10 installation so that, in the end, you will have a dual boot machine---i.e., you can choose at boot time whether to run windows or linux.)
First, boot up Windows 10 and get to the DOS command line (CL) by openning a Command Prompt window.
At the DOS CL, invoke the
diskmgmt.msccommand to open the Disk Management utility.Right click on the Windows partition (usually
C:volume) and select theShrink Volumeoption in order to reduce the partition size.Wait for the system to collect partition size data, enter the desired amount of space you want to shrink, and hit in Shrink button.
After the shrink process completes, new free space will appear on your drive. This free space is where Ubuntu will be installed.
Installation of Ubuntu 18.04
When prompted for the type of installation, I recommend choosing the minimal option to avoid installing too much bloatware. You can easily add additional software later using apt install <program name>.
(apt is the Debian package manager, which provides the standard means of installing and remove software on Debian based distributions, such as Ubuntu.)
The additional software packages that I like to install when setting up a new Ubuntu machine are listed in the sections below, along with commands required to install them.
The remaining sections of this page describe things to do after installing Ubuntu. These sections describe how to implement the specific configuration and customizations that I like, as well as fix some hardware issues specific to the Lenovo X1.
(I could add many more details about installing Ubuntu here, but this is covered extensively elsewhere.)
Post Install Stage 1: configuration tweaks
Upgrade installed packages
sudo apt update
sudo apt upgrade
Fix display resolution and zoom
The resolution on the latest X1s can reach 2560x1440, which is incredibly hight for a 14"-diagonal screen. As a result, upon login, the window manager defaults to 200% zoom, which makes everything appear too big, as if the machine has pathetically low resolution.
On the other hand, 100% zoom (i.e., no zoom) requires a very good pair of eyes or a very good pair of binoculars (or both) to see what's on the screen. To solve this, set the zoom to 100% and then use the command line to achieve a comfortable fractional zoom level of, say, 140% (i.e., 1.4 zoom factor), as follows:
-
Hit Windows key, then type
settingsand hit Enter. -
In the "Devices > Displays" section, set the zoom level to 100% (no zoom).
-
If everything is too small (but too big at 200% zoom), then invoke the following command to obtain a 1.4x zoom factor:
gsettings set org.gnome.desktop.interface text-scaling-factor 1.4
To make this fix easier to use in the future, I recommend creating a file called zoom.sh, in a directory in your search path, with the following contents:
#!/bin/bash
gsettings set org.gnome.desktop.interface text-scaling-factor $1
Then make the file executable and create a link to it with a simpler name; e.g., if you put the file zoom.sh in the $HOME/bin directory, do the following:
chmod a+x zoom.sh
ln -s $HOME/bin/zoom.sh $HOME/bin/zoom
and make sure the $HOME/bin directory is in your search path (invoke echo $PATH to see your search path).
Then, to execute this new shell script, applying a scaling factor of, say, 1.2, you would simply enter zoom 1.2 on the command line.
Configure bash shell, path, emacs, etc
See my linux utils repo, especially the dotfiles-setup subdirectory.
(N.B. There is some overlap between the dotfiles-setup procedure and what's described below; e.g., in both places I suggest installing emacs.)
Adjust trackpad sensitivity
The following references are useful
#. https://help.ubuntu.com/community/SynapticsTouchpad #. https://askubuntu.com/a/761504/100671 #. https://www.reddit.com/r/thinkpad/comments/5rcwlq/heres_how_to_get_the_perfect_trackpoint/
For a while the fixes described in this section were not necessary (on Ubuntu r 18.04.2). However, my trackpad has started acting funky again, so I'm now back to using the synaptics driver.
Following the advice given on the webapges listed above, I did the following.
N.B. The instructions in this section assume you have the mg (microscopic Emacs) editor installed. You should either install mg before following these instructions (e.g., with sudo apt install mg), or replace occurrences of mg with the name of your favorite text editor.
-
Make sure the
xserver-xorg-input-libinputpackage is installed.sudo apt-get install xserver-xorg-input-libinput -
Edit the file
/etc/udev/rules.d/10-trackpoint.rules,sudo -i mg /etc/udev/rules.d/10-trackpoint.rules
so that it includes the following lines:
ACTION=="add",
SUBSYSTEM=="input",
ATTR{name}=="TPPS/2 IBM TrackPoint",
ATTR{device/sensitivity}="132",
ATTR{device/speed}="158",
ATTR{device/inertia}="6",
ATTR{device/press_to_select}="0"
-
Finally, change the acceleration of the cursor.
sudo mg /usr/share/X11/xorg.conf.d/90-libinput.confReplace the first section with the following code:
Section "InputClass"
  Identifier "libinput pointer catchall"
  MatchIsPointer "on"
  MatchDevicePath "/dev/input/event*"
  Driver "libinput"
  Option "AccelSpeed" "-0.40"
EndSection
Save the file with
C-x C-c. -
Finally, reboot and test the trackpoint and touchpad.
Generate ssh keys
Generate ssh keys and and post the public key on your github and bitbucket account pages.
ssh-keygen
# Hit Enter (to select default filename)
# Hit Enter twice (to select/confirm empty passphrase)
cat $HOME/.ssh/id_rsa.pub
Copy all of the output that the previous command produces including ssh-rsa and your usename@hostname and past it into the input windows on the "ssh keys" pages at github and bitbucket. (Login to account at github.com and bitbucket.org and find the Settings -> SSH page.)
Fix window-toggling, terminal shortcut, mouse scroll direction, key repeat speed
- Hit Windows key, then type
settingsand hit Enter. - In the "Devices > Keyboard" section,
- select "Switch windows" and type
Alt-Tabto set the switch-window behavior to the old-style. - select "Launch terminal" and type the
Backspacekey to disable it. - scroll to bottom and click
+to add a new keyboard shortcut; in the "Name" field, typeLaunch terminal left; in the command field, typegnome-terminal --geometry 140x75+0+0and select "Set shortcut..." and typeAlt+Ctrl+T. - click
+again; in the "Name" field, typeLaunch terminal right; in the command field, typegnome-terminal --geometry 140x75-0+0and select "Set shortcut..." and typeShift+Alt+T. (N.B. the - instead of + in "140x75 - 0+0".)
- select "Switch windows" and type
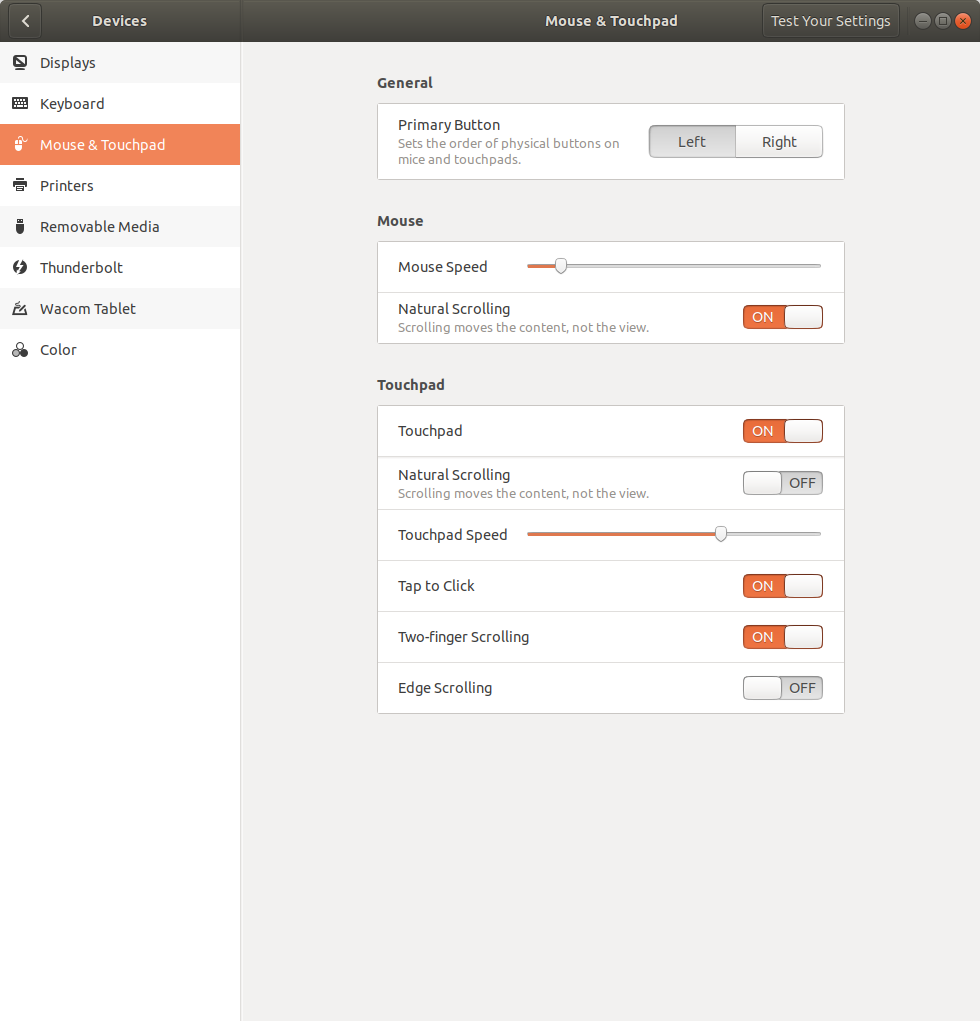
- In the "Mouse & Touchpad > Mouse" section, set "Natural Scrolling" to OFF.
- In the "Mouse & Touchpad > Touchpad" section, set "Natural Scrolling" to OFF.
- In the "Universal Access" Section select "Repeat Keys"
- Move both the "Delay" and "Speed" sliders to the left.
Emacs shortcuts, Ctrl position, Top bar, and theme
-
Install
gnome-tweak-toolwith the commandsudo apt install gnome-tweak-tool
-
Launch gnome-tweak-tool by typing
gnome-tweaksat the command prompt. -
In the "Keyboard & Mouse" section,
- set "Emacs Input" to ON.
- select the "Additional Layout Options" button, click the arrow next to "Caps Lock behavior" and select "Caps Lock is also a Ctrl"
-
In the "Top Bar" section, set "Battery Percentage" and "Clock > Date" to ON.
-
Install Numix theme:
sudo add-apt-repository ppa:numix/ppasudo apt-get updatesudo apt-get install numix-gtk-theme numix-icon-theme-circle(See this page for more detailed instructions about installing the Numix theme.)
-
Launch
gnome-tweaksand select the "Appearance" settings and adjust the "Themes" settings as desired.(I like the following:
Applications: Adwaita-dark Cursor: Redglass Icons: Numix-Circle
Post Install Stage 2: install recommended software
Additional software installed with apt
The following is a list of apps I install from the command line using sudo apt install <name of package>
(The command used to install all packages at once appears below.)
| Name | Description |
|---|---|
| emacs | GNU Emacs editor (metapackage) |
| coq | the Coq proof assistant |
| proofgeneral | a generic frontend (IDE) for proof assistants |
| prooftree | proof-tree visualization for Proof General |
| git | fast, scalable, distributed revision control system |
| mg | microscopic GNU Emacs-style editor |
| nemo | File manager and graphical shell for Cinnamon |
| build-essential | Informational list of build-essential packages |
| cmake | cross-platform, open-source make system |
| dconf-tools | transitional dummy package |
| libgmp-dev | Multiprecision arithmetic library developers tools |
| pm-utils | utilities and scripts for power management |
| Okular | Universal document viewer |
| djview4 | djvu document viewer |
| texlive | TeX Live: A decent selection of the TeX Live packages |
| texlive-bibtex-extra | TeX Live: BibTeX additional styles |
| texlive-generic-extra | TeX Live: transitional dummy package |
| texlive-latex-extra | TeX Live: LaTeX additional packages |
| texlive-latex-recommended | TeX Live: LaTeX recommended packages |
| texlive-publishers | TeX Live: Publisher styles, theses, etc. |
| texlive-science | TeX Live: Mathematics, natural sciences, computer science packages |
| texlive-xetex | TeX Live: XeTeX and packages |
| cargo | Rust package manager |
To install all of these at once, copy-and-paste the following into a terminal window:
sudo apt install emacs coq proofgeneral prooftree git mg nemo build-essential cmake dconf-tools pm-utils okular djview4 texlive texlive-latex-extra texlive-xetex texlive-science texlive-latex-recommended texlive-publishers texlive-generic-extra texlive-bibtex-extra cargo
After installing the above, apt recommends installing more packages, which I do as follows:
sudo apt install tcl-tclreadline python-pygments icc-profiles libfile-which-perl libspreadsheet-parseexcel-perl texlive-latex-extra-doc dot2tex prerex texlive-pictures-doc vprerex texlive-publishers-doc texlive-science-doc
View a brief description of these packages with the command:
dpkg -l tcl-tclreadline python-pygments icc-profiles libfile-which-perl libspreadsheet-parseexcel-perl texlive-latex-extra-doc dot2tex prerex texlive-pictures-doc vprerex texlive-publishers-doc texlive-science-doc
More software installed with apt
We will need some extra packages, mainly for creating nice documentation; these are installed as follows:
sudo apt install ttf-bitstream-vera fonts-linuxlibertine texlive-lang-french dvipng latexmk sphinx-doc sgml-base-doc debhelper docutils-doc fonts-linuxlibertine libjs-mathjax fonts-mathjax-extras fonts-stix
sudo apt install python python-pip python-sphinxcontrib.bibtex-doc python-jinja2-doc python-latexcodec-doc python-pybtex-doc python-pybtex-docutils-doc python-sortedcontainers-doc
sudo apt install python3 python3-pip python3-sphinx python3-sphinxcontrib.bibtex python3-sphinx-rtd-theme docutils-doc python3-venv
To see a brief description of each of these, do
dpkg -l ttf-bitstream-vera fonts-linuxlibertine texlive-lang-french dvipng latexmk sphinx-doc sgml-base-doc debhelper docutils-doc fonts-linuxlibertine libjs-mathjax fonts-mathjax-extras fonts-stix python python-pip python-sphinxcontrib.bibtex-doc python-jinja2-doc python-latexcodec-doc python-pybtex-doc python-pybtex-docutils-doc python-sortedcontainers-doc python3 python3-pip python3-sphinx python3-sphinxcontrib.bibtex python3-sphinx-rtd-theme docutils-doc
Here's (an abridged, reordered version of) the output.
| Name | Description |
|---|---|
| debhelper | helper programs for debian/rules |
| docutils-doc | text processing system for reStructuredText - documentation |
| dvipng | convert DVI files to PNG graphics |
| fonts-linuxlibertine | Linux Libertine family of fonts |
| fonts-mathjax-extras | JavaScript display engine for LaTeX and MathML (extra fonts) |
| fonts-stix | Scientific and Technical Information eXchange fonts |
| latexmk | Perl script for running LaTeX the correct number of times |
| libjs-mathjax | JavaScript display engine for LaTeX and MathML |
| sphinx-doc | documentation generator for Python projects - documentation |
| python-jinja2-doc | documentation for the Jinja2 Python library |
| python-latexcodec-doc | LaTeX lexer and codec library for Python (docs) |
| python-pybtex-doc | documentation for pybtex |
| python-pybtex-docutils-doc | documentation for pybtex-docutils |
| python-sortedcontainers-doc | sorted container types: SortedList, SortedDict, and SortedSet |
| python-sphinxcontrib.bibtex-doc | documentation for sphinxcontrib-bibtex |
| python3 | interactive high-level object-oriented language (default python |
| python3-sphinx | documentation generator for Python projects (implemented in Pyt |
| python3-sphinx-rtd-theme | sphinx theme from readthedocs.org (Python 3) |
| python3-sphinxcontrib.bibtex | Sphinx extension for BibTeX style citations |
| python3-venv | pyvenv-3 binary for python3 (default python3 version) |
| sgml-base-doc | Documentation for sgml-base |
| texlive-lang-french | TeX Live: French |
| ttf-bitstream-vera | The Bitstream Vera family of free TrueType fonts |
Even more software installed with apt
sudo apt update
sudo apt upgrade
sudo apt install cargo cmake curl jq libgmp-dev npm
dpkg -l cargo cmake curl jq libgmp-dev npm
| Name | Description |
|---|---|
| cargo | Rust package manager |
| cmake | cross-platform, open-source make system |
| curl | command line tool for transferring data with URL syntax |
| jq | lightweight and flexible command-line JSON processor |
| libgmp-dev:amd64 | Multiprecision arithmetic library developers tools |
| npm | package manager for Node.js |
Python software installed with pip
pip is the python installation program
These programs are useful for creating nice documentation using sphinx.
pip install https://bitbucket.org/gebner/pygments-main/get/default.tar.gz#egg=Pygments
pip install sphinx
pip install sphinxcontrib-bibtex
pip install sphinxcontrib-proof
Emacs add-on packages
Launch emacs and invoke M-x package-list-packages. From the list, choose to install the following:
- magit
- org
- org-journal
Software installed directly from source or binaries
| App Name | Description | url |
|---|---|---|
| Enpass | password manager | https://www.enpass.io/ |
| MEGAsync | synch between computer and MEGA cloud storage account | http://mega.nz |
| atom | modern extensible editor | https://atom.io |
| Chrome | web browser | https://www.google.com/chrome |
| IntelliJ IDEA | IDE I use for programming in Scala | https://www.jetbrains.com/idea/download |
| Lean | Interactive theorem prover and fp lang | https://leanprover.github.io |
| VS Code | IDE I use for programming in Lean | https://code.visualstudio.com/ |
| JDK | Java Development Kit | oracle javase overview & download page |
| Acroread | pdf viewer | See these instructions |
-
Enpass. To install Enpass, do the following:
sudo su # (enter password if/when prompted)
echo "deb https://apt.enpass.io/ stable main" > /etc/apt/sources.list.d/enpass.list
wget -O - https://apt.enpass.io/keys/enpass-linux.key | apt-key add -
Then
apt update;
apt install enpass
If necessary, do
apt --fix-broken install;
apt install enpass;
exit
-
MEGAsync. Go to http://mega.nz and use the hamburger menu on the right to select "Apps" > "sync client" and download the appropriate .deb package. Once the download finishes, click on the downloaded file and you should be asked whether to open the file with the Ubuntu App Installer. Select "yes" and install MEGAsync. Alternatively, enter
sudo dpkg -i megasync*.debon the command line. Finally, launch the Megasync program and start syncing! -
Atom. Go to https://atom.io and download
atom-amd64.deb. Once the download finishes, click on the downloaded file and you should be asked whether to open the file with the Ubuntu App Installer. Select "yes" and install Atom. Alternatively, entersudo dpkg -i atom-*.debon the command line. Finally, launch Atom from the command line with the commandatom &and start editing! -
Chrome. (see instructions for atom, except use https://www.google.com/chrome)
-
IntelliJ IDEA. Go to JetBrains download page and login, indicate your academic status, and get a license to use the full version for free. Download the file
ideaIU-2018.1.4.tar.gz(or similar) and extract it.tar xvzf ideaIU-*.gz mkdir -p $HOME/bin ln -s $HOME/opt/IntelliJ/idea-IU-181.5087.20/bin/idea.sh $HOME/bin/idea
Then make sure
$HOME/binis in your search$PATH; e.g., inputexport PATH="$HOME/bin":$PATH
at the command line, and also put this line in your
$HOME/.bash_profilefile to make it permanent. -
Lean
Warning: Installing Lean from source takes quite a while, say, 30 minutes. If you're not sure whether you need to compile Lean, consider trying the precompiled binaries.
sudo apt install git libgmp-dev cmake
mkdir -p $HOME/git/PROGRAMMING/LEAN
cd $HOME/git/PROGRAMMING/LEAN
git clone git@github.com:leanprover/lean.git
cd lean
mkdir -p build/release
cd build/release
cmake ../../src
make
-
VS Code and vscode-lean
-
Go to https://code.visualstudio.com/ and download the vscode .deb file. Once download finishes, open a terminal window, go to the directory where you downloaded the vscode .deb file, and install it with the command
sudo dpkg -i code_*.deb. -
Next, clone the
vscode-leanrepository with eithermkdir -p $HOME/git; cd $HOME/git git clone git@github.com:leanprover/vscode-lean.git
or
mkdir -p $HOME/git; cd $HOME/git
git clone https://github.com/leanprover/vscode-lean
-
Next, install the node package manager.
sudo apt install npm -
Next, install
vscode-lean.cd $HOME/git/vscode-lean npm install
-
Finally, launch vscode by entering
codeon the command line, then openvscode-leanand start developing (F5 starts the debugger).
-
-
JDK Go to the oracle javase overview & download page and download the
debfile of the version of the Java Development Kit (JDK) you wish to install, if such a file exists. (For earlier versions of Java, there are no .deb installation files available. In that case, download the appropriate .tar.gz file.)For example,
- for Java 8, download jdk-8u221-linux-x64.tar.gz from this page
- for Java 11, download jdk-11.0.4_linux-x64_bin.deb from this page
- for Java 12, download jdk-12.0.2_linux-x64_bin.deb from this page
Setup Java 8 with the following commands:
tar xvzf jdk-8u221-linux-x64.tar.gz;
sudo mkdir -p /usr/lib/jvm;

sudo mv jdk1.8.0_221 /usr/lib/jvm/jdk-8.0.221;
sudo chown -R root:root /usr/lib/jvm/jdk-8.0.221;

sudo update-alternatives --install "/usr/bin/java" "java" "/usr/lib/jvm/jdk-8.0.221/bin/java" 1;
sudo update-alternatives --install "/usr/bin/javac" "javac" "/usr/lib/jvm/jdk-8.0.221/bin/javac" 1;
sudo update-alternatives --install "/usr/bin/javaws" "javaws" "/usr/lib/jvm/jdk-8.0.221/bin/javaws" 1;
sudo update-alternatives --install "/usr/bin/jcontrol" "jcontrol" "/usr/lib/jvm/jdk-8.0.221/bin/jcontrol" 1;
Setup Java 11 and 12 similarly. (Sadly, these more recent versions of Java no longer come with
javawsandjcontrolcommands.)sudo apt install jdk-11.0.4_linux-x64_bin.deb sudo chown -R root:root /usr/lib/jvm/jdk-11.0.4; sudo apt install jdk-12.0.2_linux-x64_bin.deb sudo chown -R root:root /usr/lib/jvm/jdk-12.0.2; sudo update-alternatives --install "/usr/bin/java" "java" "/usr/lib/jvm/jdk-11.0.4/bin/java" 1; sudo update-alternatives --install "/usr/bin/javac" "javac" "/usr/lib/jvm/jdk-11.0.4/bin/javac" 1; sudo update-alternatives --install "/usr/bin/java" "java" "/usr/lib/jvm/jdk-12.0.2/bin/java" 1; sudo update-alternatives --install "/usr/bin/javac" "javac" "/usr/lib/jvm/jdk-12.0.2/bin/javac" 1;
Let's make sure all the Java programs are executable. (This may be unnecessary, but it probably doesn't hurt.)
sudo chmod a+x /usr/bin/java;
sudo chmod a+x /usr/bin/javac;
sudo chmod a+x /usr/bin/javaws;
sudo chmod a+x /usr/bin/jcontrol;
To set the default Java version, invoke the command
sudo update-alternatives --config javaand make a selection. Do the same for each Java program we wish to install. (These commands require feedback from the user, so they must be invoked separately.)sudo update-alternatives --config java
sudo update-alternatives --config javac
The next two are probably unnecessary, since we only have Java 8 versions, but it doesn't hurt to check.
sudo update-alternatives --config javaws
sudo update-alternatives --config jcontrol
See also this post for more details about this setup.
-
UACalc. To install the Universal Algebra Calculator,
-
go to uacalc.org and download one of the jnlp files (depending on how much RAM you have). (For instance, I downloaded uacalcbig8.jnlp since I have 16Gb of RAM.)
Next, we will make a desktop application launcher for UACalc.
-
In a terminal window, change the working directory to wherever you downloaded the uacalc*.jnlp file, then do
mimetype uacalcbig8.jnlpto find out how linux refers to this file type. The output should be
application/x-java-jnlp-file. Become the superuser,sudo su # (enter password when prompted)
and then invoke the following command:
echo "application/x-java-jnlp-file=javaws" >> /usr/share/applications/defaults.list
-
Open your favorite editor and create a file called
UACalc.desktopwhich you should save in your~/Desktopdirectory. The file~/Desktop/UACalc.desktopshould have the following contents:#!/usr/bin/env xdg-open [Desktop Entry] Version=1.0 Type=Application Terminal=false Exec=javaws /home/williamdemeo/opt/uacalcbig8.jnlp Name=UACalc Comment=UACalc Icon=/usr/share/icons/Numix-Circle-Light/48/apps/javaws.svg
You can choose a different value for the
Iconfield, especially if you didn't install the Numix theme, as described in the section on Emacs shortcuts, Ctrl position, Top bar, and theme. -
Right click on the new file you just created on your desktop and select
Properties > Permissionsand check the box next to "Allow executing file as program". -
Double-click on the new desktop file and select "Run" or "Okay" when confronted with "untrusted application" and other such warnings. The UACalc GUI should launch at this point.
If these instructions don't work, I'd like to know about it, so please send me a message.
-
- Rust. Run the following command in a terminal window to install Rust:
curl https://sh.rustup.rs -sSf | sh
Note: you will probably get an error if Rust is already installed on your system.
Reference: https://www.rust-lang.org/tools/install
- Zola. This site was built with zola. To install Zola on Linux, first install Rust (as described above), then follow the instructions at getzola.org.
(I did snap install --edge zola.)
-
Brother printer drivers. For our printer, the appropriate link is this one.
Download the appropriate file (for me it is linux-brprinter-installer-2.2.1-1.gz), extract and run it and then follow the onscreen instructions.
For me, the appropriate commands are:
gunzip linux-brprinter*.gz
sudo su
bash linux-brprinter-installer-* DCP-7065DN
Atom add-on packages
Launch Atom by typing atom& at the command line. Select "Edit > Preferences" from the menu, then select "-Install". Search for and install the following:
- git-plus
- git-control
- tree-view-git-status
- language-latex
- language-markdown
- markdown-preview-plus
- markdown-toc
Assuming you have the Atom package manager (apm) installed (which you probably do, if you installed Atom already), you can install all of these by invoking the following command in a terminal window.
apm install atomic-emacs git-plus git-control tree-view-git-status language-latex language-markdown markdown-preview-plus markdown-toc
VSCode add-on packages
Lauch vscode by typing code & at the command prompt. From the "View" menu, select "Extensions". A search box should appear in the left pane. Type each of the names of each of extensions in the list below, hitting enter after each name. Each time a list of candidates should appear. When you find the one you want, select "install."
- Emacs Friendly Keymap (the best Emacs keybinding extension, imho)
- Git Extension Pack (includes: Git Lens, Git History, Project Manager, gitignore)
- Lean
- reStructuredText
- Zenburn Theme
- Markdown All in One
- Better toml
- Fast Unicode Math Characters
Alternatively, you could install these (and others of my favorite extensions) on the linux command line as follows:
code --install-extension alefragnani.project-manager;
code --install-extension bungcip.better-toml;
code --install-extension codezombiech.gitignore;
code --install-extension donjayamanne.git-extension-pack;
code --install-extension donjayamanne.githistory;
code --install-extension eamodio.gitlens;
code --install-extension gerane.Theme-Zenburn;
code --install-extension GuidoTapia2.unicode-math-vscode;
code --install-extension jroesch.lean;
code --install-extension lextudio.restructuredtext;
code --install-extension lfs.vscode-emacs-friendly;
code --install-extension ms-python.python;
code --install-extension pomber.git-file-history;
code --install-extension streetsidesoftware.code-spell-checker;
code --install-extension yzhang.markdown-all-in-one;
code --install-extension ziyasal.vscode-open-in-github;
The list of commands above was produced by entering
code --list-extensions | xargs -L 1 echo code --install-extension
on the command line (source: https://stackoverflow.com/a/49398449).
Final configuration tweaks
Fix Mirror Displays option for presentations
To my surprise, the first time I tried to use the X1Y3 to give a talk, the "mirror displays" option had disappeared from its usual place in the Settings > Devices > Displays menu. It took me a while to find the solution to this, but thanks to Franck Pommereau's brilliant blog post, the solution is straight-forward.
See Franck Pommereau's post for details, but here's the gist. The command
xrandr -q
outputs information about the resolution of the connected displays. We want to add a resolution mode to the e-DPI display (the laptop display) that agrees with one of the resolution modes of the HDMI connected display (i.e., the projector). For me, the following command did the trick:
xrandr --addmode eDP-1 1400x1050
xrandr --addmode eDP-1 1680x1050
xrandr --addmode eDP-1 1920x1080i
Now the "mirror displays" option appears again in the Settings > Devices > Displays menu, and that menu also shows the 3 resolution modes (specified in the above commands) for me to choose from.
Note. When I give a presentation on a different projector, I will probably want to run the xrandr -q command again to determine the best resolution to set up for that projector.
Delete some bloatware, fav icons, fav apps, etc
The steps in this section are probably unecessary, especially if you selected "minimal" when installing ubuntu.
-
Delete "favorites" icons
- Rhythm Box. Rightclick on the Rhythm Box launcher icon and select "remove from favorites."
- Ubuntu Software. Rightclick on the Software installer icon and select "remove from favorites."
-
Delete "favorites" apps
- Amazon. Rightclick on the Amazon launcher icon and select "show details," select "Amazon," then "remove."
- Firefox. Rightclick on the Firefox launcher icon and select "show details," select "Firefox Web Browser," then click "remove."
- Libre Office Writer. Rightclick on the Libre Writer launcher icon and select "show details," select "LibreOffice Writer," then click "remove."
Also, it is advisable to invoke the command sudo apt autoremove every once in a while to get rid of obsolete packages that may be lingering on your machine.
Delete Windows partition
Reference: this lifehacker article was useful.
My machine was dual-boot capable (Linux & Windows 10), but I decided to wipe Windoze off my machine for two reasons.
- The evil Microsoft "operating" system was asking me to enter a "bitlocker key" in order to use Windows, and I would have had to login to my MS account, and probably go through a bunch of MS BS. F that S!
- Thankfully I've never had to boot into Windows on this or the other dual boot laptops that I own.
I deleted my Windows partition by following these steps.
- Insert a live CD or USB for Ubuntu Linux and start up its partition manager (like Gparted).
- Find the Windows partition in Gparted's menu---it'll be listed as an NTFS drive.
- Right-click on the Windows partition and choose "Delete" from the menu.
- Delete other Windows-related partitions, like "System Reserved" and recovery partitions, in the same way as in step 3.
At this point, we could enlarge the existing Linux partition(s), or simply make some new partitions. I chose the latter since I wanted to make a large swap partition in order to get "hibernate" to work.
(Enlarging existing linux partitions is described in the lifehacker article mentioned above.
When finished, the hard drive will only have Linux on it. However, the boot menu may still have some Windows entries. These shouldn't cause any problems, but the command sudo update-grub may succeed in removing obsolete menu entries.
Adjust amount of swap space
Good references for this topic are this page and this page.
On my machine, I did swapon --show and found a swapfile called /swapfile with only 2G of swap space.
I added a new swap partition with gparted (in the new space that became available when I deleted my windows partition), making note of the UUID that was assigned to the swap space.
Then I edited the file /etc/fstab, commenting out the line for /swapfile and insert the following new line:
UUID=b9f55147-75a2-4420-9ff6-191c1210eda4 none swap sw 0 0
Hibernate on lid close
Reference: https://help.ubuntu.com/16.04/ubuntu-help/power-hibernate.html
-
Test if hibernate works
Save all work before hibernating in case something goes wrong and open applications cannot be recovered when the computer comes out of hibernation.
Use the command line to test if hibernate works:
-
Open the Terminal to get a command line (CL) by typing Ctrl+Alt+t
-
Type
sudo systemctl hibernate↵ at the CL. (Enter your password when prompted.) -
If your machine goes into (and stays in) hibernation, then switch it back on with the power button and verify that all the previous open applications re-open. Skip to Step 2 below.
-
If your machine only stayed in hibernation for a second or two, then it's likely that you don't have at least as much swap space as you have ram on your machine.
(The
hibernateoperation will save the state of your RAM in a swapfile, so you must have a swapfile that is at least as large as your amount of RAM.)See this page or this page for information about adding or adjusting swap space. See what I did on my machine in section on adjust amount of swap space.
-
-
Enable hibernate-on-lid-close. Assuming the hibernate test works, edit the file
/etc/systemd/logind.conf.sudo -H gedit /etc/systemd/logind.conf
-
Set the parameter
HandleLidSwitchequal tohibernateby adding the following line to the/etc/systemd/logind.conffile:HandleLidSwitch=hibernate
-
Next we need the UUID of our swap partition, which must be at least as large as the amount of RAM present on the machine.
Launch the
gpartedprogram. (If you don't have it, dosudo apt install gparted.)Right click on the swap partition, select "Information" from the menu, and copy the UUID that appears in the resulting dialog box.
-
Edit the file
/etc/default/gruband addresume=UUID=b9f55147-75a2-4420-9ff6-191c1210eda4to the end of theGRUB_CMDLINE_LINUX_DEFAULTparameter definition. For example,GRUB_CMDLINE_LINUX_DEFAULT="quiet splash psmouse.synaptics_intertouch=1 resume=UUID=b9f55147-75a2-4420-9ff6-191c1210eda4"
Save the file and then invoke the command
sudo update-grub.After that, reboot the machine.
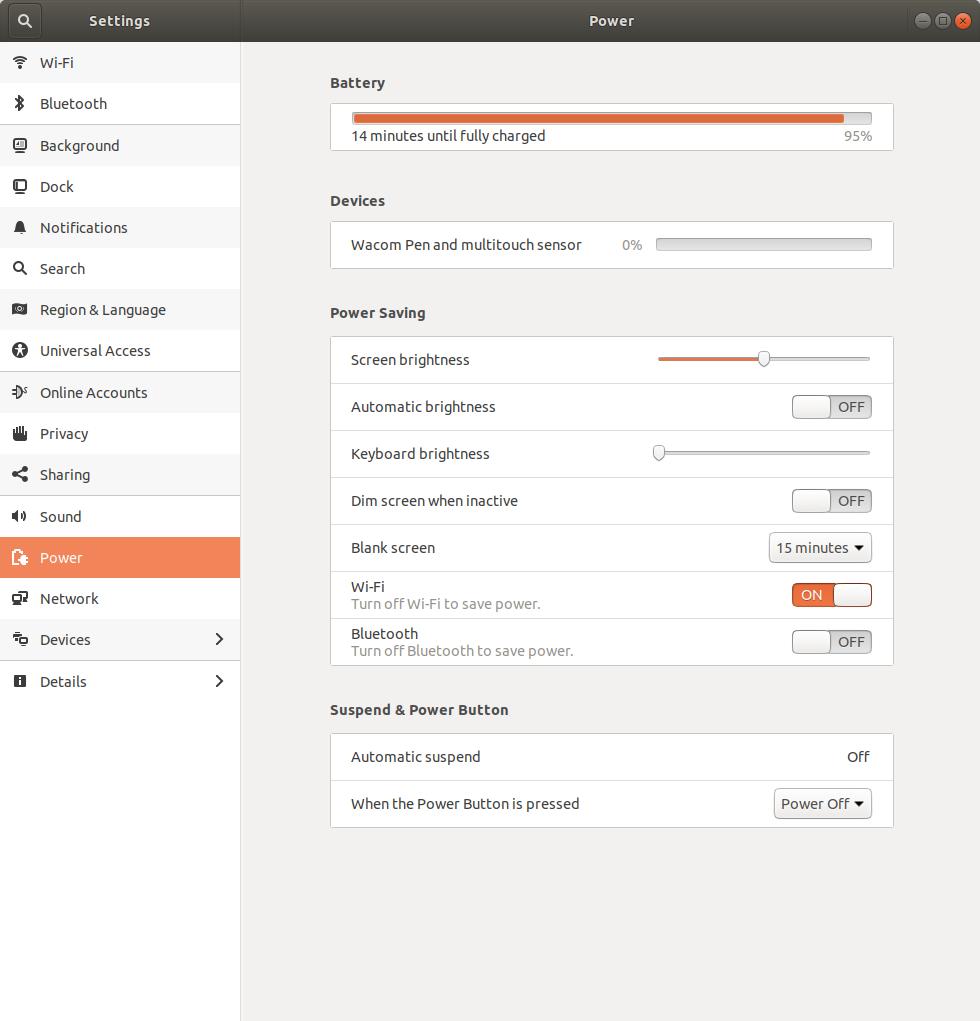
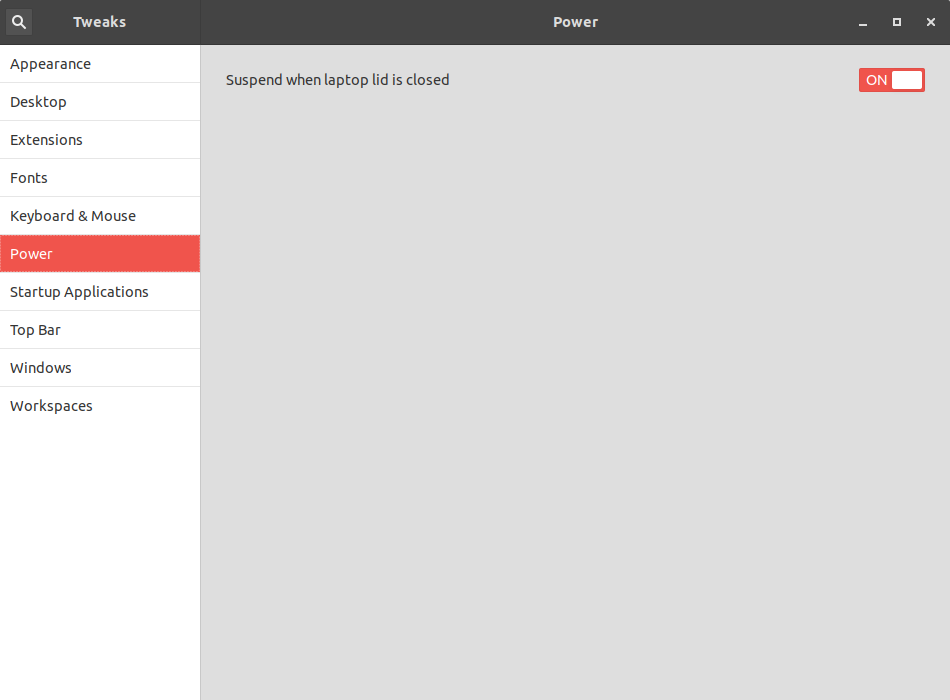
Important note. I have turned On the "suspend on lid close" setting in the "Power" menu of the
gnome-tweaksgui. (See screenshot below.)
-
Fix Lenovo X1 lid close and erratic touchpad problem
Problem. When laptop lid is closed (without shutting down), and then opened again, everything seems to work except for the touchpad. Controlling the pointer via the touchpad becomes impossible since the pointer jumps around the screen erratically.
Solution. This problem is now SOLVED using the approach described in the section "Hibernate on lid close".
Some of the steps I took in my first (unsuccessful) attempt to fix this are mentioned below in the section on failed attempt to fix wake-from-suspend problem.
Old Partial Solution. (reference: https://askubuntu.com/a/1083546/100671)
Here are some notes about a previous approach I used to try to fix the wake-from-suspend problem. Unfortunately, this approach only worked temporarily.
The following solution seemed to work at first, but then when I got home and took my (suspended) laptop out of my bag, it was very warm, and when I opened the lid, the pointer only worked for a minute or two, then froze.
Invoke the following command from the linux CL.
sudo -H gedit /lib/systemd/system-sleep/touchpad
Insert the following lines in the touchpad file by copying and pasting them into the gedit window you just openned:
#!/bin/bash

if [[ $1 == post ]]; then
    modprobe -r psmouse
    modprobe psmouse
fi
Save the file, exit gedit, and make the touchpad file executable by invoking the following on the CL.
chmod a+x /lib/systemd/system-sleep/touchpad
REBOOT the system now. When you restart, closing the laptop lid should suspend the machine (assuming you have that option set; see below) and when you re-open the lid, the touchpad should work normally.
This assumes you have the configuration options set as shown in the screenshots below.
- In the [https://packages.ubuntu.com/bionic/gnome-control-center](Gnome Control Center) application...
- In the gnome-tweaks application...
Fingerprint reader
Reference: https://forums.lenovo.com/t5/Ubuntu/thinkpad-x1-yoga-3rd-ubuntu-could-not-access-any-fingerprint-reader/m-p/5025478?page=1#5218643
The fingerprint reader that comes with the Thinkpad X1 Yoga (as of Gen 5) is supported by Linux, but you have to install the drivers for it specifically. For some reason Lenovo doesn't install them even when it ships the laptop with Ubuntu (as in my case).
My lenovo thinkpad X1 Yoga Gen 3 didn't have the ability to even see the fingerprint reader due to missing firmware, so I followed the instructions on the page linked to above.
Here is what I did.
-
Update the firmware.
In the terminal, get the latest firmware updates with
fwupdmgr refreshand thenfwupdmgr update.You should see two updates (at least) for the Prometheus Synaptic Fingerprint Reader. Install them both.
-
Enroll Fingerprint.
I'm assuming here that you're on Ubuntu 20.04 or later, which has a GUI option for fingerprint setup. If not you may want to google details about fprintd-enroll to do it via command line.
Now check Settings > Users > Disabled (this will show up in the Authentication and Login section if it worked) and click and touch the fingerprint reader to enroll a fingerprint.
More Troubleshooting
I'm not sure exactly which of all these steps made it work for me because I tried a lot of them! So I'll include the rest just in case.
Install fprint libs
If your fingerprint still doesn't work you may need to double check that fprintd is installed, as that is what linux uses to talk to the reader.
~$ sudo apt install -y fprintd libpam-fprintd
Enable PAM You may need to enable it in the Pluggable Authentication Module (PAM):
~$ sudo pam-auth-update
It will prompt for your password and then show a dialogue window with auth options. Move to the fingerprint option and toggle it "on" (*) with the spacebar if it doesn't already have a star in the box.
Hardware Probe
If all this doesn't work you should double check that you have the supported hardware.
Check your hardware by running:
~$ lsusb
It'll look something like this:
Bus 004 Device 001: ID 1d6b:0003 Linux Foundation 3.0 root hub Bus 003 Device 001: ID 1d6b:0002 Linux Foundation 2.0 root hub Bus 002 Device 001: ID 1d6b:0003 Linux Foundation 3.0 root hub Bus 001 Device 009: ID 06cb:00bd Synaptics, Inc. Bus 001 Device 008: ID 13d3:56bb IMC Networks Integrated Camera Bus 001 Device 007: ID 056a:51bd Wacom Co., Ltd Pen and multitouch sensor Bus 001 Device 006: ID 046d:c52f Logitech, Inc. Unifying Receiver Bus 001 Device 010: ID 8087:0026 Intel Corp. Bus 001 Device 001: ID 1d6b:0002 Linux Foundation 2.0 root hub
06cb:00bd Synaptics, Inc. is the fingerprint reader I have. 06cb:00bd is the hardware id (vendor ID: Device ID), and that is the one in the Lenovo Thinkpad X1 Yoga Gen 5. If you have a different ID you should check the list of hardware that fprint supports on https://fprint.freedesktop.org/supported-devices.html (ctrl-f for your hardware ID) to see if yours is there. If it's not, it may not be supported by linux.
You can check the libprintf issues on their gitlab to see if they're working on any beta support: https://gitlab.freedesktop.org/libfprint/libfprint/-/issues
You can get more details on support for your hardware here: https://linux-hardware.org/index.php?view=search&vendorid=06cb&deviceid=00bd#list
Stuff that does not work yet
This sections mentions some of the issues I haven't been able to resolve yet.
Enable open wifi login
Problem. When connecting to public wifi, the login ("Acceptable Use Policy", "captive portal") page does not appear.
Solution Hints.
References:
- https://askubuntu.com/questions/1046321/cannot-reach-public-wifi-login-page-in-ubuntu-18-04-captive-portal-issue)
- https://askubuntu.com/questions/898605/how-to-disable-systemd-resolved-and-resolve-dns-with-dnsmasq
- https://askubuntu.com/questions/826998/cannot-log-in-to-public-open-wifi-connection
What I tried first:
-
Create file
/etc/NetworkManager/conf.d/20-connectivity-debian.confusing the commandsudo -H gedit /etc/NetworkManager/conf.d/20-connectivity-debian.conf
and add the following lines to this file:
[connectivity]
uri=http://network-test.debian.org/nm
response=NetworkManager is online
interval=300
-
Restart the network manager with
sudo service network-manager restart.
restore running apps upon reboot (unsuccessful)
Hibernating instead of powering down, as described in section Hibernate on lid close above, is a suitable work-around. (When waking from hibernation, the X session is in the same state as it was before hibernation.)
Here's what I tried, but it doesn't have the intended effect of picking up where I left off... :(
Install dconf-tools
sudo apt install dconf-tools
Then run the command dconf-editor
When dconf-editor starts, select org > gnome > gnome-session, then check the box next to auto-save-session
failed attempt to fix wake-from-suspend problem
Problem. When I close the lid of the laptop (without shutting it down), and then open it again, everything seemed to work except for the touchpad. When I touch the touchpad, the pointer jumps around the screen erratically and makes it impossible to do anything with the touchpad (or the red trackpoint stick in the middle of the keyboard).
Hibernating instead of suspending, as described in section Hibernate on lid close above, is a suitable work-around, although waking from hibernation takes significantly longer than wake-from-suspend should. On the plus side, no power is used while hibernating.
Some of the steps I took in my first (unsuccessful) attempt to fix this are mentioned in this section.
WARNING: The steps below bricked my machine. Do not follow these steps!!! (I'm leaving these steps posted here as a reminder, in case some other website suggests them, these steps can be fatal. Do not proceed!!!)
Below is how I tried to fix the weird mouse behaviour observed after waking from suspend, but the consequences of this attempt were disasterous.
Do not follow the steps in this section!
Do NOT do the following!!! (You have been warned.)
-
(DO NOT) Enable Thunderbolt 3 compatibility mode in the BIOS
-
(DO NOT) Disable internal card reader in BIOS (under security settings)
-
(DO NOT) Add kernel flag: acpi.ec_no_wakeup=1
(DO NOT) Do this by adding the following line to the file
/etc/default/grubGRUB_CMDLINE_LUNUX="acpi.ec_no_wakeup=1"
And then (DO NOT) run
sudo update-grub
 follow me on github
 Curriculum Vitæ


© 2019 William DeMeo
![]()